Basic Call Routing Setup
Setting up a Call Campaign
These instructions provide a basic outline for setting up a call campaign.
Establish a Campaign or Source Tracking Phone Number
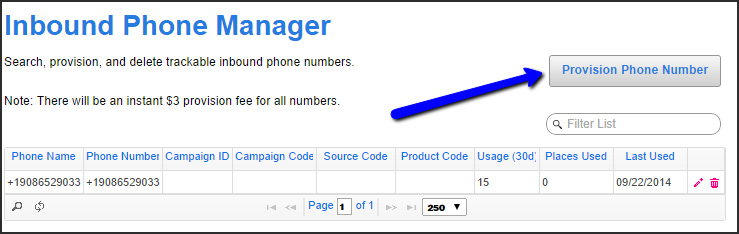
To provision a local or toll-free number – navigate to:
Admin Settings->Local Options->Inbound Phones
Click the ‘Provision Phone Number’ button.
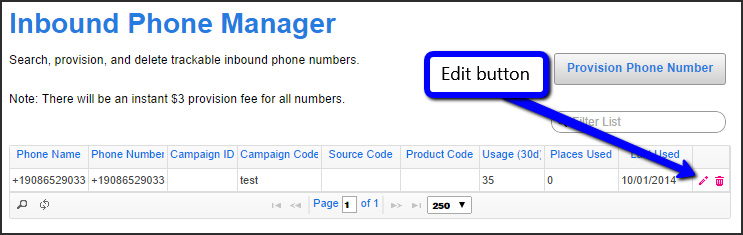
For campaign specific call routing, set a campaign code. Return to ‘Inbound Phone Manager’ after provisioning your number and click the pink edit pencil.
Select the ‘Campaign’ tab and enter your campaign code in the ‘Campaign Code’ field.
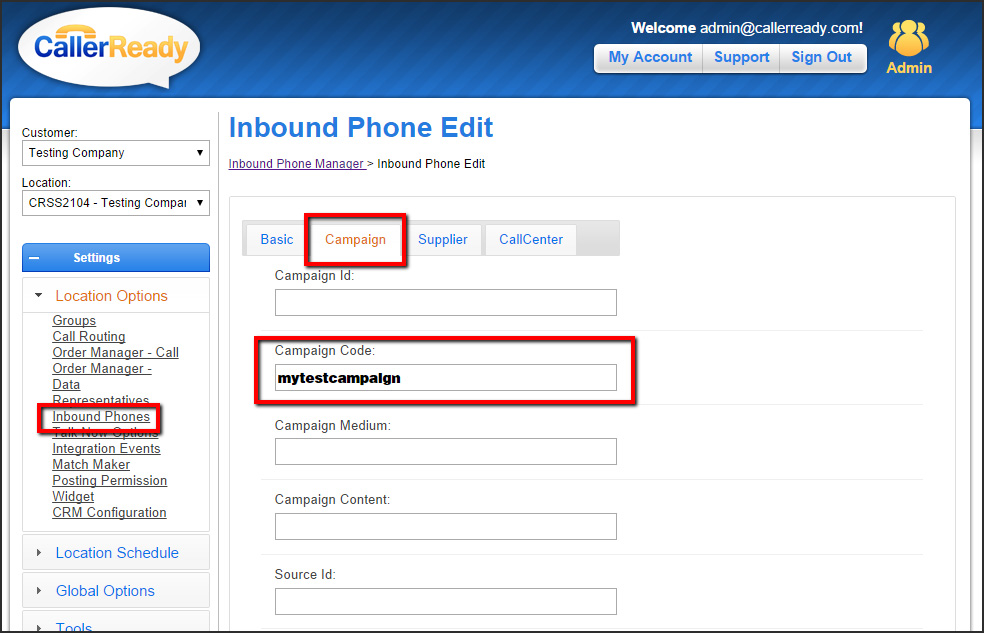
Be sure to click ‘Save’ when done.
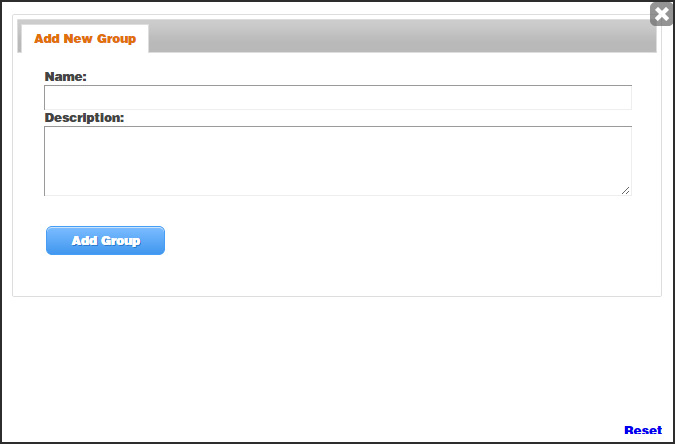
Create a Group for your Campaign
To create a new group, navigate to:
Admin Settings -> Groups
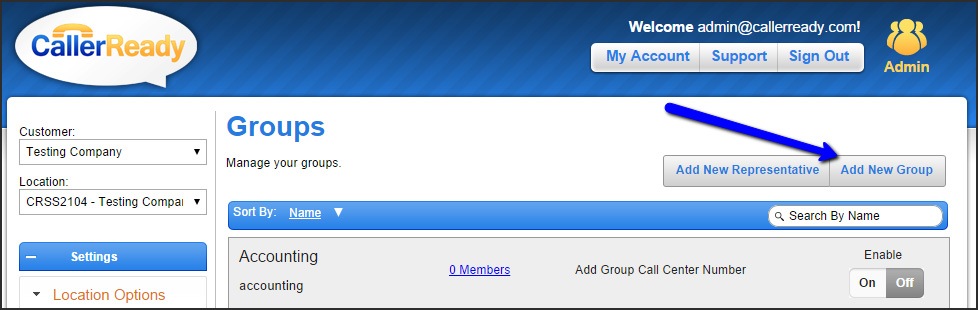
Add a Group name and description and click ‘Add Group’
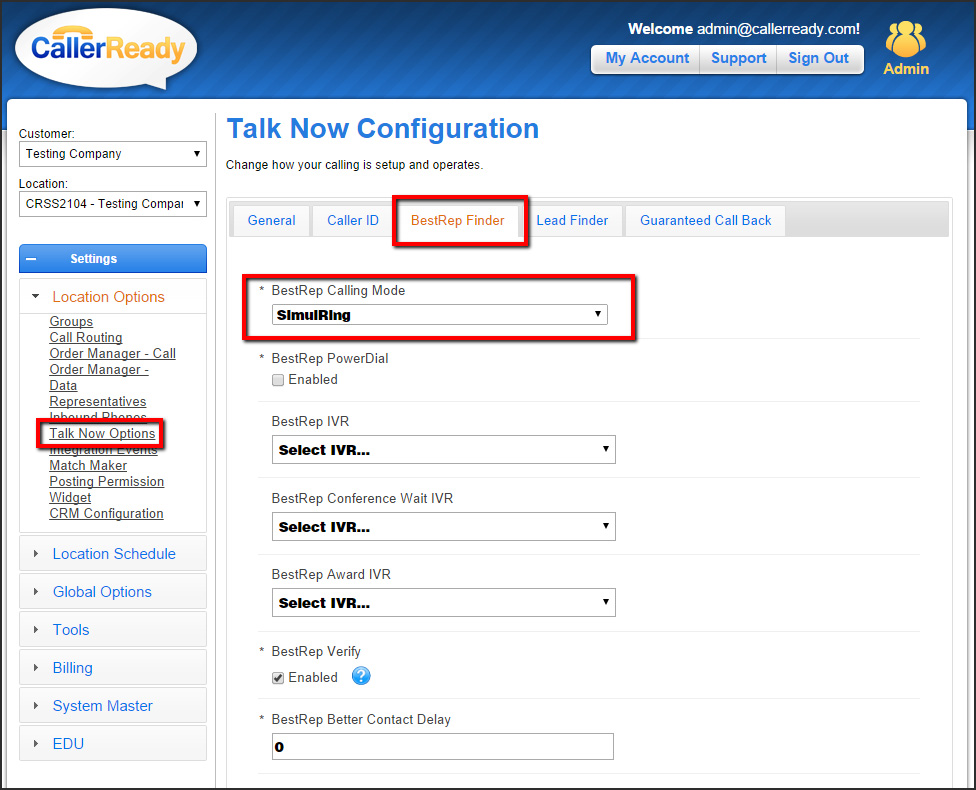
Note: Please note for Representatives/Agents, you need to select Simul-Ring mode (not Call Center mode) within the location’ s Talk Now->Best Rep Finder tab settings
Setting up Call Routing
To setup call routing, click ‘Call Routing’ in settings and click, ‘+Add New Route’
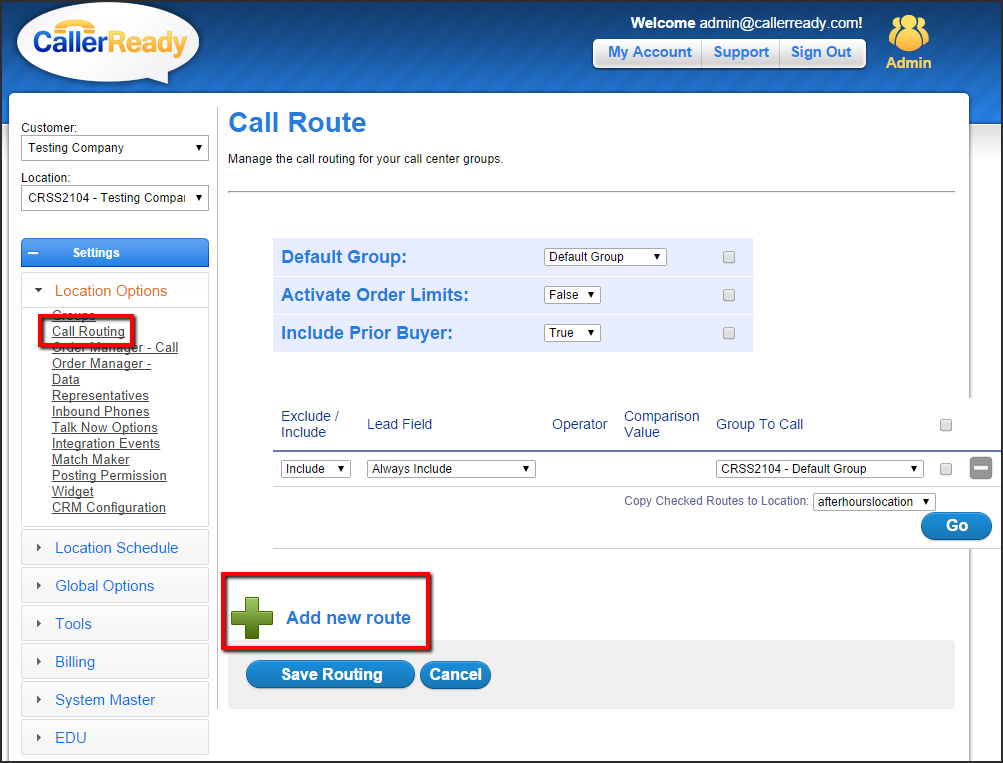
Under ‘Lead Field’ , select ‘Campaign Code’ .
Set ‘Operator’ to ‘Equals’
Set ‘Comparison Value’ to ‘mytestcampaing’
Save by clicking, ‘Save routing’
Notes
You can add as many groups as should be included.
If you have other call routing lines that include groups that should not be included in this one, you will need to add ‘Exclude’ lines for those groups, e.g. If you have Always Include Group XYZ and you don’t want to call Group XYZ when the ‘My Test Campaign’ line rings, you will need to add an EXCLUDE Campaign Code Equals My Test Campaign for Group XYZ to prevent that group from being called.
Call Routing goes through all the include lines (each group is added a max of 1 time) and then all the exclude lines. If a group matches an exclude line, it will be removed from the routing
240192 799279I came across this great from you out of sheer luck and never believe lucky enough to say also credit you for any job nicely done. 206203